The Rubik's Cube is one of the most iconic and challenging puzzles in the world. First invented in 1974 by Ernő Rubik, this 3x3 cube has captured the fascination of millions, whether you're a casual puzzle enthusiast or an aspiring speedcuber. The complexity of solving it can be intimidating at first, but with patience and practice, anyone can learn how to solve the Cube. In this guide on how to solve Rubik's cube 3x3 step by step, we'll break down the process and help you master the 3x3 puzzle solver techniques in no time.
Understanding the Basics of the Rubik's Cube
Before diving into how to solve a 3x3 Rubik's Cube step by step, let's quickly review the basic structure of the cube:
- The 3x3 Rubik's Cube consists of 26 smaller pieces: 8 corner pieces, 12 edge pieces, and 6 center pieces.
- Each center piece represents the color of a face, and it stays fixed in place as you twist the cube.
- The goal is to get all 6 faces of the cube to match a single color, usually starting with white, followed by other colors like red, blue, orange, green, and yellow. In other words, there are six colors on a 3x3 Rubik's Cube.
How to Solve a 3x3 Rubik's Cube Step by Step
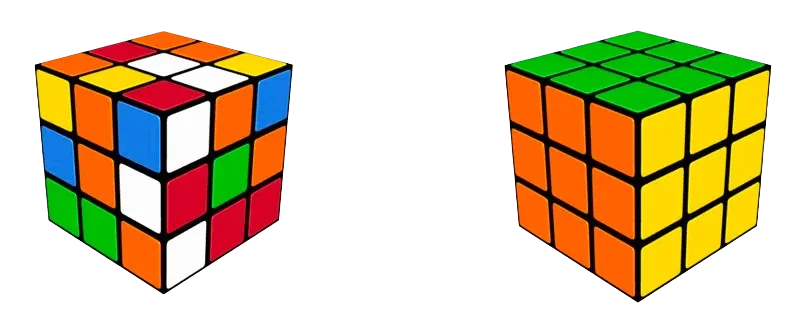
Now that you understand the basic structure, let's walk through the process of solving a 3x3 Rubik's Cube. We will also include the most common algorithms used in each step to help you along the way.
Step 1: Solve the White Cross
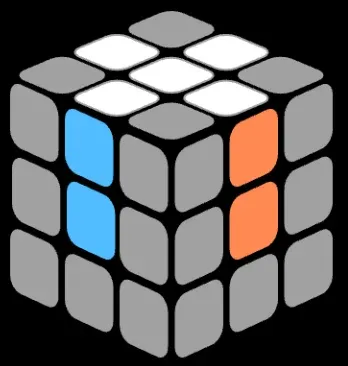
How to solve 3x3 Rubik's cube? Start by solving the white cross on the top face. This step sets the foundation for the rest of the cube.
- The white cross involves positioning the white edge pieces around the white center piece.
- Each white edge must also match the color of the adjacent center pieces, creating a cross shape on the white face.
- At this point, you don't need a specific algorithm for each move. Focus on aligning the edge pieces manually. If necessary, use simple moves like U (Up), D (Down), L (Left), R (Right), F (Front), and B (Back) to maneuver the pieces into place.
Step 2: Solve the White Corners
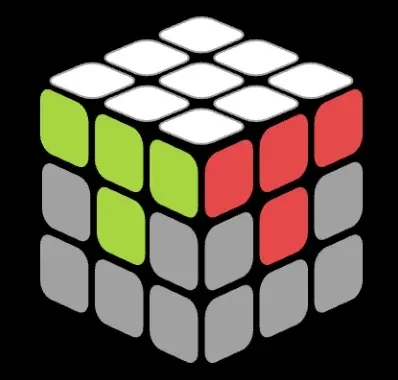
Once you have the white cross completed, the next step is to solve the white corners.
- You need to position the white corner pieces in such a way that they match the white center piece and the adjacent center pieces.
- The corner pieces should align with the color of the two adjacent center pieces and be placed in the correct position.
- To position the white corners correctly, use the "Right Hand Algorithm" or other beginner-friendly algorithms to move them into place.
What algorithms should you use at this point? To insert the white corner pieces into the correct position, use the R U R' U' algorithm. This will move the corner piece from the bottom layer to the top layer:
- R = Right face 90 degrees clockwise
- U = Upper face 90 degrees clockwise
- R' = Right face 90 degrees counterclockwise
- U' = Upper face 90 degrees counterclockwise
Repeat this algorithm until the white corners are all in their correct positions.
Step 3: Solve the Middle Layer Edges
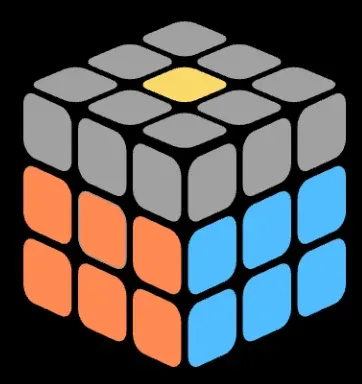
With the white layer completed, focus on solving the middle layer edges. This step is important for bringing the cube closer to completion.
- The goal is to place the edge pieces of the middle layer into their correct positions.
- Use algorithms to shift the edge pieces into place without disturbing the already solved white layer.
- Make sure that the middle layer edge pieces match the adjacent center pieces on both sides of the cube.
There are two algorithms you can apply to the process of solving a 3x3 puzzle:
- Algorithm 1 (For moving edges clockwise): U' L' U L U F U' F'
- U' = Up face 90 degrees counterclockwise
- L' = Left face 90 degrees counterclockwise
- L = Left face 90 degrees clockwise
- F = Front face 90 degrees clockwise
- F' = Front face 90 degrees counterclockwise
- Algorithm 2 (For moving edges counterclockwise): U R U' R' U' F' U F
- R = Right face 90 degrees clockwise
- R' = Right face 90 degrees counterclockwise
- F' = Front face 90 degrees counterclockwise
- F = Front face 90 degrees clockwise
Repeat these algorithms as necessary to position the middle layer edges correctly.
Step 4: Solve the Yellow Cross
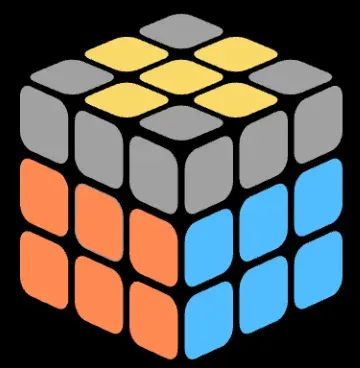
Now that the first two layers are solved, it's time to solve the last year of the Rubik's Cube. First, trackling the yellow cross on the top face.
- In this step, the goal is to get all the yellow edge pieces in place, forming a yellow cross on the top face.
- Don't worry about the yellow corners yet; focus only on the edges. Use specific algorithms (F R U R' U' F') to move the yellow edges into place while maintaining the integrity of the first two layers.
- F = Front face 90 degrees clockwise
- R = Right face 90 degrees clockwise
- U = Upper face 90 degrees clockwise
- R' = Right face 90 degrees counterclockwise
- U' = Upper face 90 degrees counterclockwise
- F' = Front face 90 degrees counterclockwise
Step 5: Solve the Yellow Corners
Once the yellow cross is complete, focus on positioning the yellow corners.
- The goal is to position the yellow corner pieces in the correct spots, even if they are not yet oriented correctly.
- Use algorithms (U R U' L' U R' U' L) to move the yellow corners into the correct positions:
- U = Upper face 90 degrees clockwise
- R = Right face 90 degrees clockwise
- L' = Left face 90 degrees counterclockwise
- R' = Right face 90 degrees counterclockwise
- L = Left face 90 degrees clockwise
At this point, the cube may look like it's almost solved, but the yellow corners may not yet be in the right orientation.
Step 6: Orient the Yellow Corners
Now that the yellow corners are in the right spots, it's time to orient them correctly so the entire yellow face is completed. Use algorithms that rotate the yellow corners one by one without disturbing the rest of the cube. The goal is to get the yellow stickers on all four corners facing upwards.
Use the R' D' R D algorithm to rotate the yellow corners:
- R' = Right face 90 degrees counterclockwise
- D' = Down face 90 degrees counterclockwise
- R = Right face 90 degrees clockwise
- D = Down face 90 degrees clockwise
Step 7: Finish Solving the Cube
The final step is to position the last layer's edges to complete the cube. You'll need to use algorithms (F2 U' L R' F2 L' R U' F2) to adjust the edges of the top layer to ensure that the whole cube is solved:
- F2 = Front face 180 degrees
- U' = Upper face 90 degrees counterclockwise
- L = Left face 90 degrees clockwise
- R' = Right face 90 degrees counterclockwise
- F2 = Front face 180 degrees
- L' = Left face 90 degrees counterclockwise
- R = Right face 90 degrees clockwise
- U' = Upper face 90 degrees counterclockwise
- F2 = Front face 180 degrees
Once all the pieces are in their correct positions and orientations, you've successfully solved your 3x3 Rubik's Cube! The cube should now be fully aligned with each face being one solid color.
Beginners Use a 3x3 Cube Solver App
For beginners, one helpful tool for learning how to solve a 3x3 Rubik's Cube is using a Rubik's Cube solver app. These apps allow you to input your cube's current configuration, and they will generate the optimal solution for you step by step.
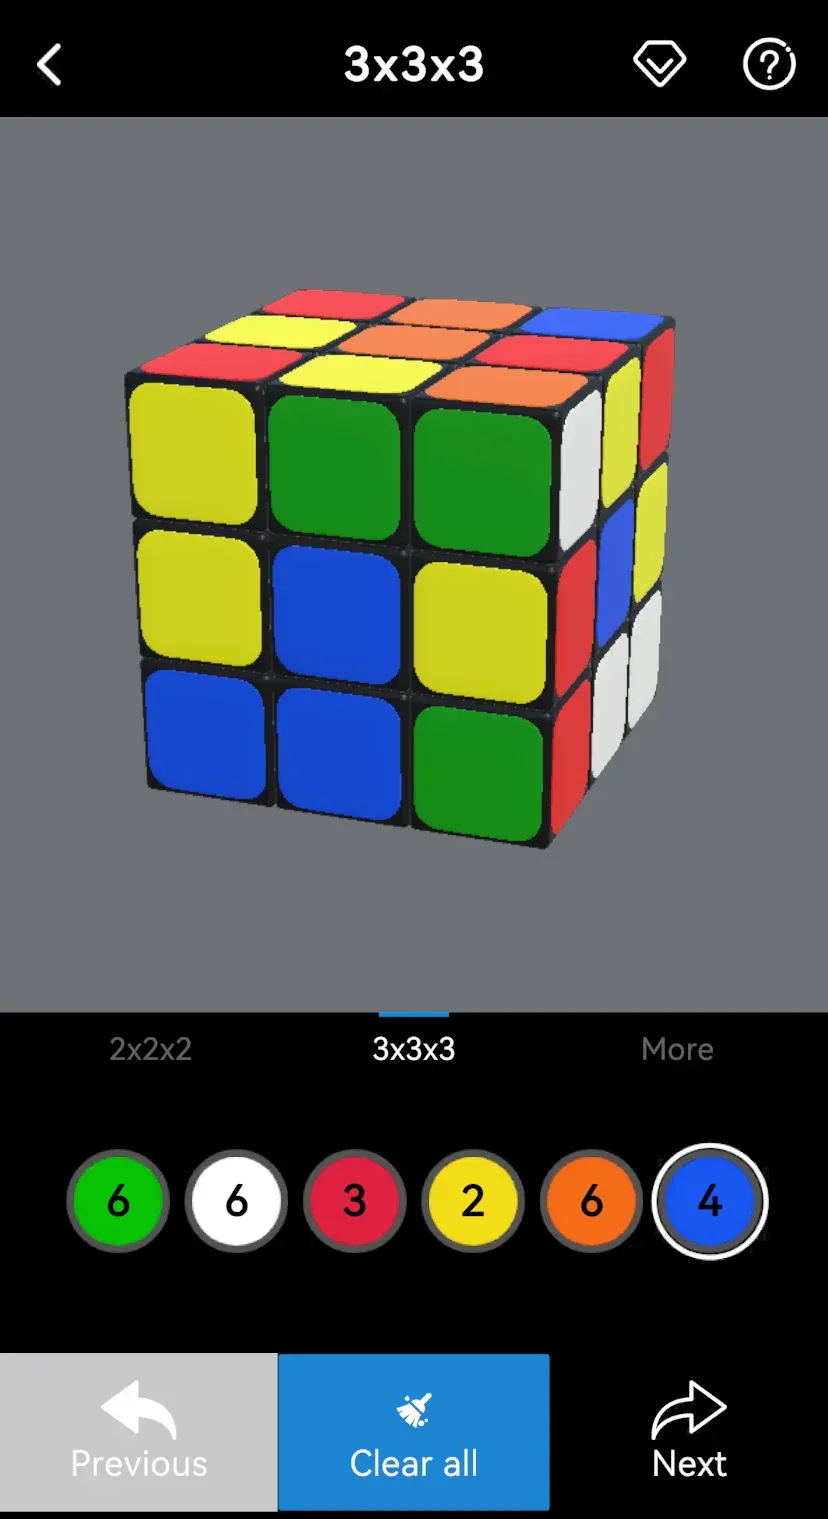
If you're just starting out and find the algorithms confusing or difficult to remember, a 3x3 puzzle solver app can guide you through the solution process, offering visual cues and instructions. These apps are an excellent way to get familiar with the cube's movements and to understand how different algorithms work. Over time, you'll begin to recognize patterns, and the process will feel more intuitive.
Tips and Tricks for Solving the Rubik's Cube Faster
As you become more comfortable with solving a 3x3 Rubik's Cube, you might want to improve your speed and efficiency. Here are some advanced tips:
- Learn Advanced Algorithms: The beginner's method is effective, but speedcubers often learn more advanced algorithms, like the Fridrich Method, to reduce the number of moves required.
- Practice Finger Tricks: Speedcubing isn't just about knowing algorithms—it's also about mastering finger tricks to turn the cube faster and more efficiently.
- Stay Consistent: Solving the Rubik's Cube consistently requires practice. The more you solve it, the faster and more intuitive the process will become.
Conclusion
Learning how to solve a 3x3 Rubik's Cube step by step can seem daunting at first, but with the right approach and a bit of patience, anyone can do it. Whether you are just starting out or looking to improve your skills, following this step-by-step guide will help you solve Rubik's Cube 3x3 with ease.
Remember, practice is key. The more you practice, the quicker and more efficient you'll become, and before you know it, you'll be able to solve the cube without thinking twice. So grab your Rubik's Cube and start solving!
How to Solve Rubik's Cube 3x3 Step by Step FAQ
Q: What is the best 3x3 solving method?
The best 3x3 solving method for beginners is the CFOP method (Cross, F2L, OLL, PLL). It's widely used and effective, breaking down the solving process into manageable steps. For those looking to improve their solving speed, speedcubers often use more advanced methods like Roux or ZZ, but CFOP is perfect for most beginners aiming for a reliable and efficient solution.
Q: How to solve a 3x3 Rubik's cube in one move?
It's not possible to solve a 3x3 Rubik's Cube in just one move unless it's already solved or almost solved. A fully unsolved cube requires a series of moves or algorithms to reach the solved state. However, if you're looking for a shortcut or a solution app, a 3x3 cube solver can generate the steps for you from any configuration to solve it in the fewest possible moves.